


Dump
the Pump |
|
Although
we all love our cars and trucks, spending money on them unnecessarily
is something none of us want to do. Unfortunately there are occasions
we have no choice, if we want part A then we must buy part B as well.
Other times a saving will just slip us by, but then is that so unusual
in this throw away society. Have we just got into the habit of replacing
entire components instead of just replacing what is necessary? For those
of us who either don’t want to spend unnecessarily or simply don’t
have the money to do so, there are ways to make savings. Take power
steering pumps for example. There is a number of GM, Ford and Mopar
vehicles out there with a power steering pump that is integral to the
fluid reservoir. When one of these pumps needs to be replaced more often
than not, when ordered, it will come with a new reservoir. Now for that
little fact that not many people know, the pump can usually be removed
from the reservoir and replaced. This obviously saves the cost of a
new reservoir. So how do you go about finding out if you have the type
of pump that you can do this with? Well the easiest way is to simply
call your parts supplier; they should be able to tell you. The next
big question is how do you change the pump? Well it should be said that
the instructions that come with some of these replacement pumps leave
a lot to be desired. They are usually badly printed and read as though
a chimpanzee has written them. Unfortunately this is not encouraging,
but once again we shall come to the rescue and try to guide you through
what is in fact a relatively simple procedure. |
|
Once
you’ve discovered that you can replace your power steering pump
without replacing the reservoir. You need to place your order with you
your parts supplier and wait for the part to arrive. Most new pumps
will come with some kind of instruction sheet and a selection of new
seals, see fig 1. Our new pump even came with a simple pulley installation
tool for interference fit pulleys. Before you jump in and start pulling
things apart it is worth just casting an eye over the power steering
hoses. It is recommended, by most pump manufacturers, that you replace
any steering hoses that have been on your vehicle for longer than two
years or any hoses that are beginning to lose their flexibility. Old
hoses can contain various residues that build up on the inside of the
hose. These residues can cause damage to the internal workings of a
new pump and possibly cause pump failure. Now, because steering hoses
tend to rot from the inside out, this can make detecting damaged hoses
extremely difficult. So if you are in any doubt at all about the condition
of your steering hoses then, don’t think about it, just replace
them. |
|
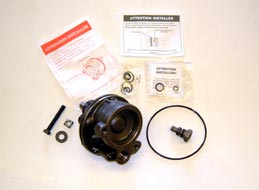 Fig 1. The new kit. |
|
Now
for the fun part, fitting the pump. Without wanting to sound too obvious
the first step is to remove the pump and reservoir assembly from the
vehicle. We won’t talk you through this part of the job here as
this will procedure will vary depending on vehicle. With the pump assembly
off, see fig 2, the next step will be to remove the pulley. Most GM
and Mopar pulleys are an interference fit and simply need to be pulled
from the pump shaft. We used a special power steering pump pulley-removing
tool, fig 3. |
|
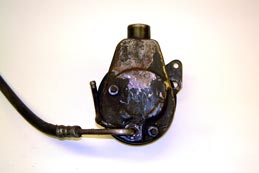 Fig 2. The old pump and reservoir. |
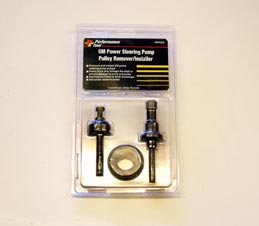 Fig 3. The pulley removal tool. |
These
tools are only a few pounds and certainly make light work of removing
the pulley, fig 4 and fig 5. Although we haven’t shown it in the
pictures, it is recommended that you either have someone hold the pump
assembly for you or you use a vice. Otherwise you will find your pump sliding around your workbench like Torville and Dean. |
|
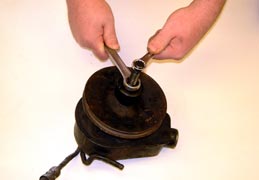 Fig 4. Remove the pulley. |
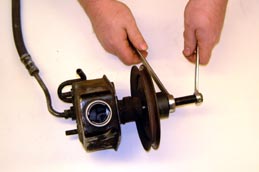 Fig 5. Still removing the pulley |
| With the pulley
removed you will now want to remove any mounting brackets, hoses and mounting
bolts still fixed to the pump, fig 6 and fig 7. |
|
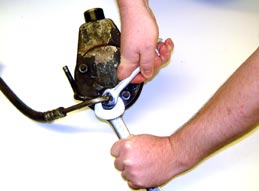 Fig 6. Remove the hoses. |
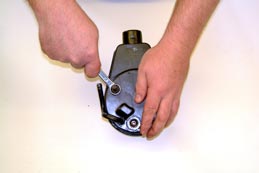 Fig 7. And the fitting bolts. |
Finally
remove the pressure hose fitting, fig 8, from the back of the power
steering pump. Take care when removing this fitting, as there is a spring,
fig 9, and small valve, fig 10, just behind it. These do have a habit
of dropping out and doing a Zebadee around the workshop. You are now
ready to remove the pump from the reservoir. This step actually sounds
a lot easier than it actually is, but all that is required is care and
perseverance. Using a block of wood, gently tap around the nose of the
old pump, fig 11. This is where the perseverance comes in. Keep tapping
the pump will eventually come free from the reservoir. Care should be
taken here not to clout the reservoir and distort it in anyway. This
could lead to leaks when the pump and reservoir are reassembled. |
|
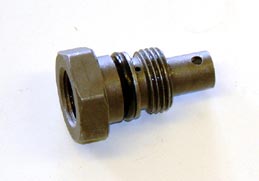 Fig 8. The pressure hose fitting. |
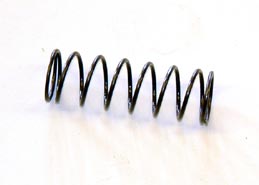 Fig 9. A spring. |
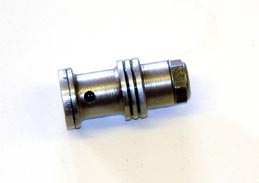 Fig 10. Pressure fitting valve. |
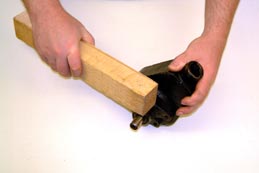 Fig 11. Tap the nose, GENTLY! |
Right,
well done for getting this far, it should all be down hill from here,
although before we begin the reassembling the pump there are a couple
of things we need to do. First, get the old and the new pumps next to
each other and compare them, fig 12. Do they look the same? It is worth
doing this, as there are a number of parts suppliers who will not accept
parts for return if there has been an attempt to fit them. Another thing
to bear in mind, is the box that the pump arrived in. Many suppliers
will require the old pump back, and as such you will probably have paid
a small fee known as a core charge. This core charge is refundable on
return of the old pump. Most companies will only refund the core charge
if the old pump is returned in the new pumps box. A final pointer on
returning your old pump, please clean it, even if you just wipe it over
with an old rag, again some companies will not accept cores for refund
if they are dripping with power steering fluid. |
|
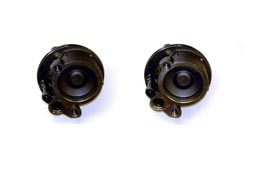 Fig 12. Compare the new and old pumps. |
|
The
next thing to check before we assemble the pump is the old reservoir,
fig 13. Sometimes when removing the old pump the reservoir may receive
the odd knock or two and this can mis-shape the lip that seals the reservoir
to the pump. The white arrows in fig 13 show such a knock on our example
reservoir. This dent must be put right before the new pump is fitted
or it may not seal correctly and it will leak fluid. We used a small
block of wood and a mallet just to reshape the lip.
Some manufacturers will place a small magnet inside the reservoir. This will collect any small pieces of metallic debris that may accumulate within the pump, preventing premature failure. Our example had a small magnet on the inside wall of the reservoir and is shown in fig 13 by the red arrow. If your pump has a magnet just make sure it is in place before you start putting things back together. |
|
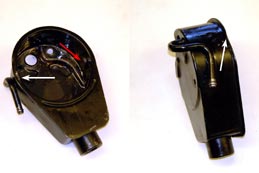 Fig 13. Check the old reservoir for damage. |
|
With
these couple of checks behind us we are finally ready to begin getting
everything back into the reservoir. First thing we need to do is fit
are the seals. You will be happy to know that a wide selection of seals
should be supplied with your new pump, fig 14. The large seal obviously
fits around the main body of the pump, fig 15. The remaining seals fit
into the two mounting holes and the pressure-fitting hole in the back
of the pump, fig 16. The seals you fit should sit just proud of the
hole they are in, so when mated to the reservoir they prevent leakage
in these areas. When fitting these three seals you may want to use a
small dab of grease or oil just to hold them in place. |
|
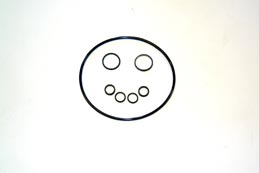 Fig 14. A bunch of new seals. |
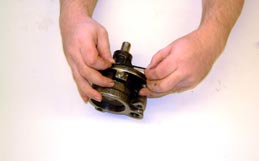 Fig 15. Replace all the seals. |
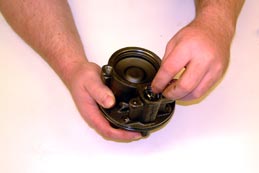 Fig 16. These seal the pump to the reservoir. |
|
| Done? Good, you are now ready to fit the new pump into the reservoir. Just prior to this, take some fresh power steering fluid and smear it around the main seal, fig 17. This will help prevent leaks between the pump and the reservoir. Gently ease the pump into the housing, fig 18. | |
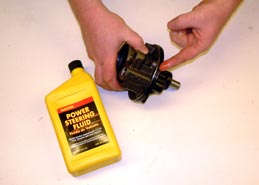 Fig 17. Smear steering fluid on the new seals. |
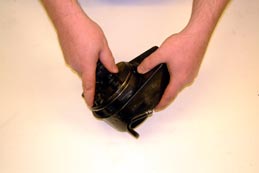 Fig 18. Ease the pump into the reservoir. |
Once
we couldn’t push the pump in to the housing any further by hand,
we used a piece of wood and gently tapped the housing down onto the
pump, fig 19. Care should obviously be taken here so as not to cause
any distortion to the reservoir. Whatever thoughts might go through
your mind at this time don’t feel tempted to knock the pump into
the reservoir. Never strike the new pumps shaft with a hammer, a piece
of wood or a penguin in a hope to get the pump into the reservoir. Hitting
the shaft could cause damage to the pump, not only that but the seals
may fall out of their holes allowing the pump to leak. Whilst thinking
of all this remember to make sure that the mounting holes and the pressure-fitting
hole in the pump lines up with those in the reservoir, fig 20. |
|
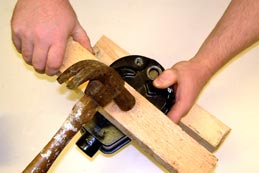 Fig 19. Gently tap the pump home. |
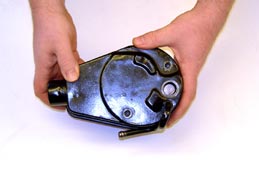 Fig 20. Mkae sure the holes all line up. |
| You will now need to fit the spring, valve and pressure fitting, fig 21. You should have received new ones with the new pump. Using an appropriately sized spanner tighten the pressure fitting, fig 22. | |
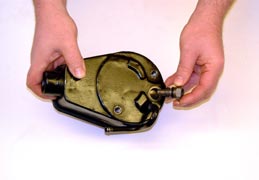 Fig 21. Fit the new valve, spring and fitting. |
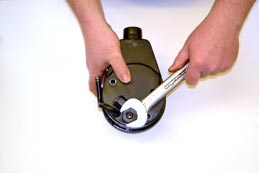 Fig 22. Do not over tighten. |
It’s
now time to refit the pulley. If your pulley is an interference fit
type, you will need to pull it on using a special tool, fig 24. As mentioned
earlier, whatever you do don’t hit the pulley on with a hammer
or use a press to fit it. Any ‘in or out’ pressure on the
shaft could cause permanent damage to the new pump. With the pulley
fitted all that remains is to refit any mounting brackets and then remount
the pump to the vehicle. |
|
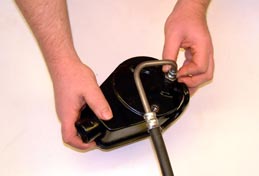 Fig 23. Check the hose fits. |
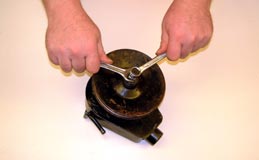 Fig 24. Fit the pulley. |
Of
course what we have talked about here would work equally well if you
had a pump that was functioning perfectly but just need to replace the
reservoir. With the pump back on sit back and think about how you are
going to spend the money you saved by not buying a pump with reservoir
or going to a garage to have the work done....mmm doughnut. |
|
 |
|