

Perfecting
your pickup |
|
If
we think in terms of popularity, then what is in vogue at the moment?
Well, American muscle cars seem to be more popular than they have been
for a long time, popular music seems to be taking a turn back to the
60’s and 70’s and the Internet seems to be the place to
do business. However, more popular than an orange Dodge Charger, Robbie
Williams and ebygum.com seems to be the American pickup. Demand for
these huge, yet somehow graceful beasts appears to be growing, as does
the demand for accessories. It would seem that paying £30,000
for a truck is not enough, this is where the need to accessorise comes
in. There is now an ever growing market supplying tonneau covers, side
rails, side steps, buck liners and exhaust systems in fact the list
could go on. So with all this available what would you choose? Just
looking at what is out there, the only limitations would appear to be
imagination and budget. In that case maybe we should change our question
to “What is going to make an already stunning truck look and sound
that much better?” Having talked to the owner of our example truck,
a 2004 Dodge Ram 1500 with 5.7 hemi, mmm nice, he decided to go for
a stainless steel sports exhaust system and a locking fibreglass tonneau
cover, colour coded to match the truck. Although for a while he did
toy with the idea of fitting chrome side rails to the top edge of the
buck. These would have to match the already fitted side steps. Obviously
he couldn’t have the rails and the tonneau, so in the end the
tonneau won. |
|
| The original system on the truck was not the most exciting thing we had ever seen, fig 1 and fig 2, but then there are not many stock systems that are going to win prizes for style. They are designed to be functional and that’s about it. The stainless steel Magnaflow cat-back system that was chosen was a different story. | |
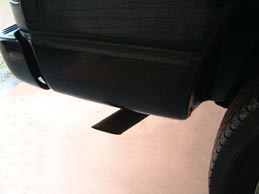 Fig 1. Not very exciting tail pipe. |
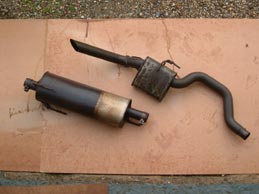 Fig 2. The original exhaust system. |
| It was well made and superbly finished, fig 3. The bends were smooth and the welded brackets were all in exactly the right place. All this and a comprehensive installation kit, fig 4, what more could we ask, well nothing from the system. On top of this, fitting the system looked like it was going to be a straightforward job, which can only be a good thing. | |
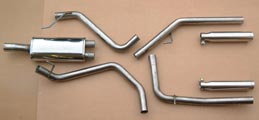 Fig 3. MagnaFlow Stainless system. |
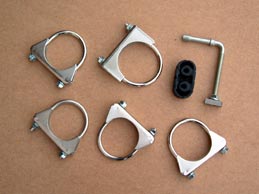 Fig 4. The installation kit. |
With
the truck up in the air removal of the old system was easy. Simply loosen
the clamps in front, fig 5, and behind the main muffler, fig 6, and
slide the metal brackets out of the rubber hangers, fig 7. With the
muffler out of the way it was relatively easy to dismantle and remove
the remaining parts of the system. The new system would be converting
the system from single tail pipe to dual tail pipe. One tail pipe following
the route of the old system and exiting on the right-hand side, the
new pipe cutting across the vehicle, going over the axle and exiting
the rear on the left-hand side. The new muffler fitted the old pipe
perfectly using a locator tab to ensure correct alignment, fig 8. |
|
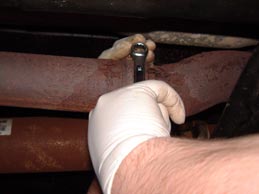 Fig 5. Clamp in front of the muffler. |
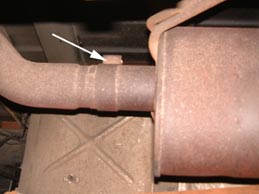 Fig 6. Clamp behind the muffler. |
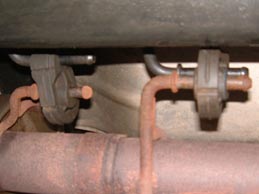 Fig 7. Slide the hangers out of the rubber mounts. |
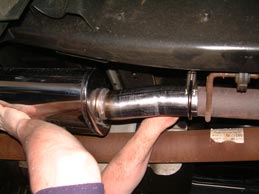 Fig 8. Alignment is easy, use the locator tab. |
Less
than an hour into the installation and everything was moving along nicely.
However, it wasn’t long before things took a turn for the worse.
On fitting the section of pipe that went up and over the axle and out
to the left, we noticed it could not be rotated enough to allow the
tail pipe to exit the rear of the vehicle correctly. We spent some time
rotating pipe and muffler trying to figure out the dilemma we were in.
It suddenly dawned on us that there was some kind of large fitting just
below the centre of the buck floor. On closer inspection we realised
that this was the remains of a fifth wheel tow hitch. It was decided
that this had to go or we could not get the left-hand tail pipe to sit
correctly. To remove this we had to undo the eight 19mm bolts that held
the hitch to two cross members. It was then a case of lifting out the
buck liner so we could remove two u-bolts that actually went through
both the hitch and the buck floor. With this done we then had to remove
one of the cross members, just a single bolt each end, so we could lower
the hitch assembly away from the truck. Although on close inspection
it could be seen that this hitch, fig 9, was an aftermarket addition
to the truck, to the uninitiated it could have easily appeared as an
original part of the vehicle. This would obviously leave many an exhaust
installer scratching their heads, as it did us at first. After all,
we had a system that was made specifically for the vehicle we had, so
why did it not fit! So the moral of this little diversionary tale is,
beware of any aftermarket fittings that may hamper the installation
of your nice new shiny exhaust. If you are unsure of anything call your
supplier and hopefully they can point you in the right direction. |
|
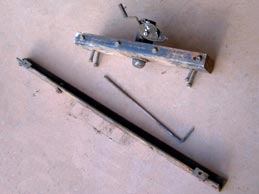 Fig 9. An unexpected fifth wheel hitch hampered installation. |
|
So
with our short excursion in to fifth wheel hitches behind us we were
able to install the first section of pipe that headed out to the left,
fig 10. When installing the rear section on the left we had to fit a
hanger in to a predrilled hole in the chassis, fig 11. This hanger allows
some height adjustment for this section of pipe. Having reached this
point we fitted the tailpipe finisher. The finisher just slid over the
pipe work and was secured by a single bolt clamp. This fitting allowed
us to adjust the finisher so that it was flush with the rear of the
truck. |
|
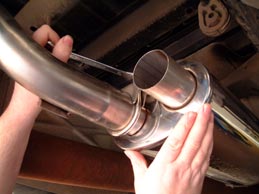 Fig 10. First pipe to the left. |
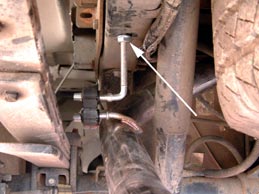 Fig 11. Fit hanger in a pre drilled hole. |
As
already mentioned, the right-hand tailpipe followed the route of the
old system. Coming out of the silencer and finishing just above the
axle. Welded to this section of pipe was a bracket that needed to be
fitted into a rubber hanger at the muffler end, fig 12. Moving towards
the rear of the vehicle a second piece of pipe took the system to its
exit point, at the back of the truck. This piece of pipe also had a
bracket that needed to be placed in a rubber hanger, fig 13. This pipe
was also neatly finished with a 3.5-inch diameter rolled tip. |
|
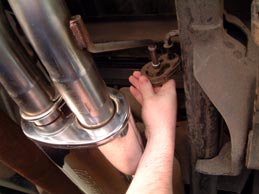 Fig 12. Fit the hanger in the rubber mount. |
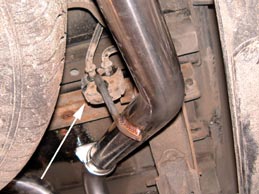 Fig 13. Do the same with the tail pipe. |
With
the worst of the job out of the way all that remained was to start tightening
the clamps and check the alignment of the system. For more of a professional
finish we spent a little time rotating pipe work, fig 14, to make sure
that the tail pipe tips were both the same distance from the underside
of the rear bumper, fig 15. Once we were happy with this all the clamps
were given a final tightening. Then it was time for the moment of truth,
after lowering the truck we fired up the engine, what a sound, a low
rumble at idle with that sporty roar that really brought the 5.7 hemi
to life, when the engine was revved. We just love it when a plan comes
together, fig 16. |
|
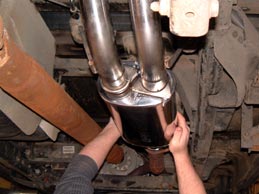 Fig 14. Take time to align the system. |
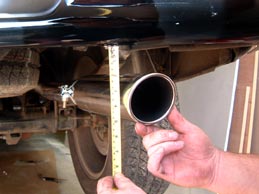 Fig 15. It never hurts to take some measurements. |
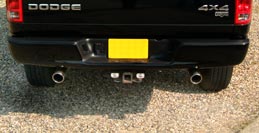 Fig 16. Simple as that... |
|
With
the first part of our “challenge” complete we decide to
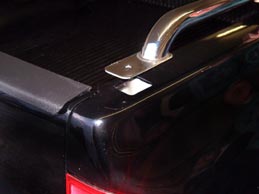
see just how easy it would have been to fit the side rails. We managed
to find some rails that were the same profile as the side steps, fig
17. Our Dodge Ram had pre-made rail holes in the top edge of the buck,
fig 18. The holes just had a press in plastic cover. We have since discovered
that a number of American trucks have these pre-made holes. However
if your truck doesn’t have them you will have to drill. The easiest
way to get the hole in the right place is to use masking tape. Place
a strip of masking tape roughly where the hole is to be drilled. Then,
using a tape measure, find the centre line of the top edge of the buck
and mark it on the masking tape, fig 19. The masking tape not only makes
marking where to drill simple but also helps to stop the drill bit skipping
over the surface of your paint work. With both holes drilled, if you
need to, offer the rail up to check the position of the holes, fig 20.
As long as everything lines up you’re ready to bolt it all together.
When you do this don’t forget to place the protective rubber gasket
under the foot of the side rail, fig 21. |
|
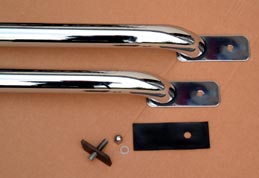 Fig 17. Chrome bed rails. |
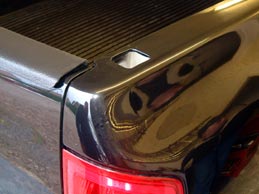 Fig 18. The holes were already there. |
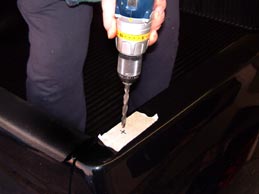 Fig 19. Take care if you need to drill. |
|
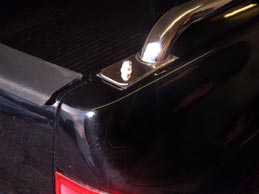 Fig 21. Chrome bed rails, they look great. |
|
Although
the rails made a huge difference to the truck they had to come off to
make way for the tonneau. The cover we supplied was a hard fibre glass
lockable type that had been painted to match the vehicles original colour,
black in this case. Even though the vehicles owner had decided on the
hard tonneau there are other options such as the soft tonneau shown
in fig 22.
The hard tonneau we supplied came extremely well packed, and to help it maintain its shape it was bolted to a very substantial wooden frame, see fig 23. This frame was simple to remove. |
|
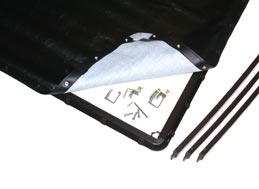 Fig 22. Soft tonneau, a cheaper option. |
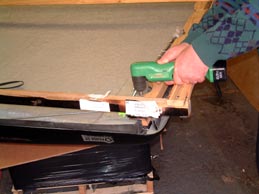 Fig 23. Removing the packing. |
With
the framework removed it was time to give the tonneau a thorough clean,
fig 24. Once we had finished cleaning we decided to check the installation
kit. It is worth taking five minutes to do this no matter what job you
are carrying out. There is nothing worse than getting half way through
a job only to find you are missing a vital component. To say this fitting
kit was comprehensive almost seems like an understatement. It even came
with a small bottle of touch up paint just in case you get any small
chips or scratches. Also supplied with the fitting kit was a roll of
foam like material. This foam was self-adhesive and designed to fit
around the edge of the tonneau to help protect the truck's paintwork
when the cover is fitted, fig 25. |
|
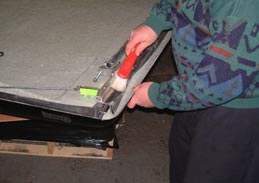 Fig 24. Clean up time. |
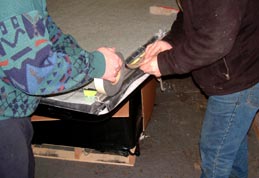 Fig 25. Fitting the protective foam strip. |
Things
seemed to be moving along fairly briskly at this point, all that remained
before we actually fitted the cover, was to set in place the four aluminium
clamps that would hold the cover to the buck. The clamps resembled a
small ‘G-clamp’ with a small nut and bolt going through
the side to mount the clamp to the cover. One word goes along with the
next step and it can’t be over looked, HELP. You will need help
to actually lift the cover into place. The cover being fitted here was
for an eight-foot bed, now that’s a lot of fibreglass and makes
the cover extremely heavy. However, three of us managed to get the cover
on the truck and into place. Once there, just one or two people could
make small adjustments. With the cover where we wanted it was clamped into position, fig 26 & 27. |
|
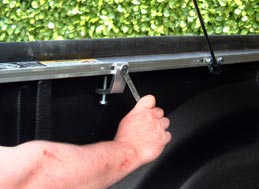 Fig 26. Tighten all the clamps. |
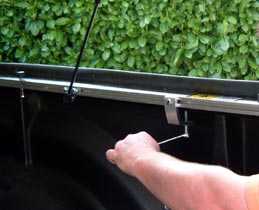 Fig 27. Yes, all the clamps. |
Considering
the size of this cover it was made to being incredibly adjustable. There
are four rubber bump stops that can be adjusted up and down. These obviously
stop the cover crashing into the buck sides when being shut and help
to prevent vibration when closed, fig 28. The latch plates are also
adjustable. These can be moved to give a more positive feel to the latching
of the cover as it is closed, fig 29. |
|
 Fig 28. Adjust the bump stops. |
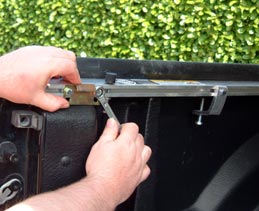 Fig 29. Adjust the latch plates. |
The
final adjustable components are the hydraulic support struts. These
can be adjusted to alter the open height of the cover, fig 30. Spending
some time with these adjustments can lead to rewarding results. The
cover can be made to look like it has always belonged to the vehicle,
fig 31. |
|
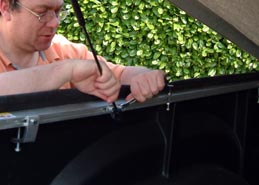 Fig 30. Cheer up nearly done. |
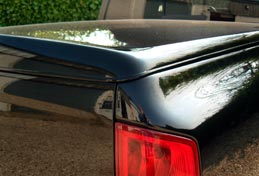 Fig 31. Perfect fit. |
After
the cover had been fitted a couple of weeks, the owner of the truck
told us that he believed the Dodge’s fuel economy had actually
got better. This makes perfect sense if you think about it. Without
the cover fitted there is a huge amount of drag caused by the open buck.
This drag also causes a large amount of noise, which gets transferred
to the cab area. Obviously with the cover fitted this drag is almost
completely eliminated, and of course reducing drag increases fuel economy
and also makes for a quieter drive.
With its new exhaust and tonneau the Dodge not only sounded like a completely different truck, but also looked it. So is this the answer to our initial question of, “What is going to make an already stunning truck look and sound that much better?” Well we think so, just look at the evidence in fig 32. |
|
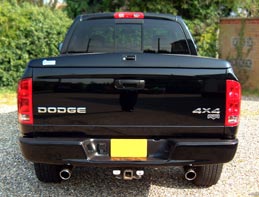 Fig 32. Stunning... |
|