


Panel alingment Classic American issue187 |
|
So what is it that makes one car stand out and look that little bit better than the rest? Is it the better than average paint?... Yes! Is it the flawless chrome?.. Yes! Could it be the exquisitely re-trimmed interior? Well again yes, and to all the other attributes that add up to make a vehicle stunning in appearance and fit for any show. But with all this said the most overlooked finishing touch is the fit of the panels. Have you ever, when indulging in the great British past time of sitting in traffic queues, looked at the car in front? Let me rephrase that slightly, have you ever studied the car in front and thought why does the trunk lid not fit properly? Why is one rear lamp at a different angle to the other? And all this from a vehicle that may have only been on the road for less than a year. So why is it that Aston Martin’s Vanquish has shut lines and panel alignment that borders on perfection, whilst the average Ford Focus looks like a troop of baboons threw the parts at it from a distance. In a word, quality control, okay two words, the quality control department of any motor manufacturer is the group of people who decide whether a vehicle is finished to a high enough standard to be released to the public. Unfortunately this standard as we have said varies greatly not only between manufacturers but also from country to country. Now whether your vehicle is fifty years old or a week old, the fit of a panel can make or break its appearance. At worst it could appear as though the car has been in an accident or at least had some bodywork carried out at some point in its life. This is a noteworthy point for future reference when inspecting a vehicle you may intend to buy. Always look along the side of any potential candidate and see how the door shuts to the body, fig 1, does the door fit well or is there any room for improvement? The same applies to all the other panels and trims on the vehicle. If a panel has been changed at some time it would be nice to know why. This may or may not point to poor alignment but damage at some point in the vehicle history. Of course whilst the appearance of your car is important from a sales point of view, it can be even more important if you are showing it on a regular basis. |
|
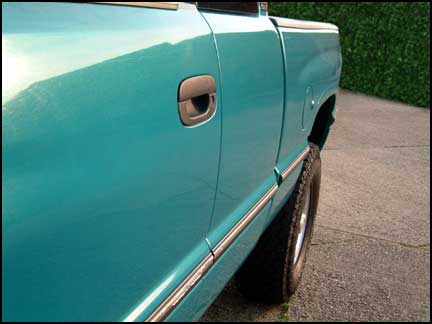 Fig. 1 |
|
Through
the next couple of pages we will try and help with the basic know how,
do’s and don’ts and tools required to straighten up and
release the potential of you and your car….in some cases we may
need more pages. First thing to do is decide which panel or panels need adjusting and in what direction. Once you know the direction you are going to move the panels you need to see if the movement it attainable. This may not be possible for more than one reason. You may not be able to adjust a panel because its hinge or bump stop is already at its extreme therefor there may not be movement in the direction you need. If you are moving panels that are adjacent to each other you need to work out what affect moving one panel will have on the adjoining pane, fig 2. |
|
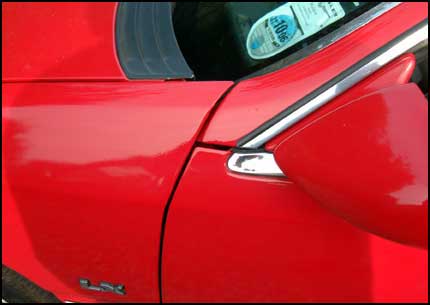 Fig. 2 |
|
In
our first example let’s look at the problem of door alignment.
Your door shut may need to move say 3/16” (in metric that’s
4mm +/- 1km) which may equate to 1/16” movement at the hinge.
We are obviously allowing for the pivot point to extremity equation,
which may or may not involve pie r squared or e = mc hammer. Before
you move anything, and that includes your eyeballs, please, please,
remember that you would be wise to mark the original position of hinges
or striker, fig 3. This is important for two reasons,
first you can see instantly how much adjustment has been made and secondly
you can return the hinge to its original position if required. Whenever
you are adjusting for panel alignment, whether it is the hood, trunk,
doors or fender, always remember to move it a small amount at a time,
yes, rule of thumb here is ‘little and often’. If you move
to much in one go you run the risk of the panels actually touching when
closed and this in turn will lead to chipped or damaged paint or worse.
After moving a small amount try gently closing the hood or door but
not latching it, this is mainly to see if the movement is sufficient
and to see if the latch or striker bolt needs moving, fig 4.
If you slam or try to close the door without checking the latch position
you could damage the latch or jam the door closed. |
|
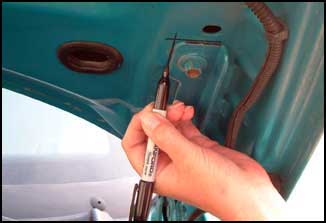 Fig 3 |
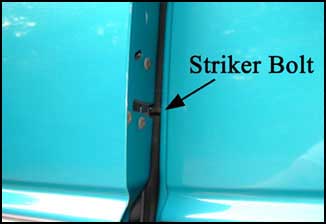 Fig 4 |
| When
you are getting close to the correct position loosen the striker, fig
5, and move it as required. In some cases you may need to just
tap the striker to get it on the move, we used the rubber-covered handle
of an old claw hammer, fig 6. Once again marking it
with a felt pen gives an instant picture of how much movement is made.
|
|
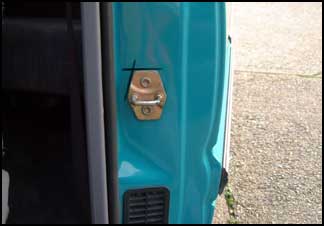 Fig 5 |
 Fig 6 |
On
most doors the hinges are adjustable on both planes, fig 7.
This means that you can raise or lower the leading or trailing edge,
also movement is available to reposition the door inboard or outboard
of the cabin area. Some doors do not have the facility to adjust the
door in or out, in this case you would need to shim the hinge if required,
this would only move the door outwards at the top or bottom. Before
realigning the doors always inspect the hinge condition as this could
be excessively worn, if this is the case then replace the hinge pin
and bushes where possible, fig 8. |
|
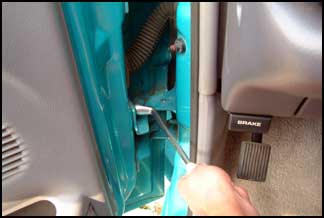 Fig 7 |
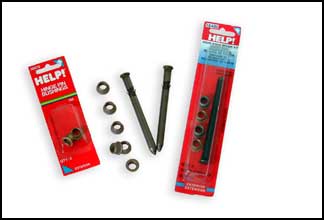 Fig 8. |
In
some hinge types there is no facility to accommodate pin replacement
in this case if there is excessive ware you may need to replace the
hinge assembly. The easiest test for excessive hinge ware is to open
the door and try to lift the trailing edge of the door, if the door
moves up and down its time to inspect the hinges. If the ware is not
excessive you should be able to adjust to compensate. When adjusting
the door continually step back and admire your work, this works on two
levels, first you can see how the alignment is progressing and second
the wife may think you are working very hard and bring you a cup of
light refreshment! When completely satisfied with the result (that’s
the door not the refreshment) make the final tightening of hinge and
striker. It is worth remembering that no matter how old your vehicle
is, with correct alignment the doors should close with the minimum of
effort. If you find yourself having to lift the door slightly or slamming
it, the chances are you still have a problem. Time to move on to the
next challenge. |
|
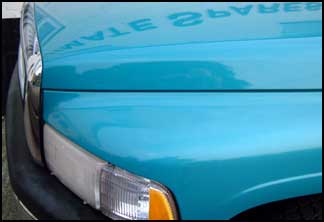 Fig 9 |
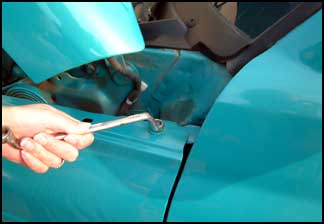 Fig 10 |
If you need to realign the fenders, wings for those of you who still speak English, then expect to spend more time and effort on these as opposed to the doors. Fender alignment is much more involved because of the many adjacent parts you may also need to adjust, such as the nose cone, bumper cover, grille or trim, fig 9. A lot of this obviously depends upon the vehicle you are working on. Okay, let’s begin; start by slackening the fender at the top, fig 10, and bottom, fig 11. Small metal shims are used at the fenders mounting points to make the necessary adjustments. The correct body shims should be available from all good UK based American parts suppliers. These shims are available in different thickness depending on the amount of adjustment required, fig 12. |
|
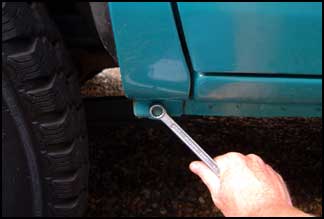 Fig 11 |
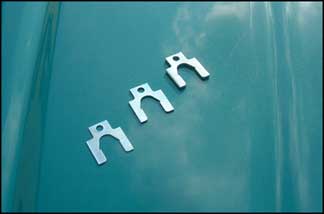 Fig 12 |
If you are unable to obtain the correct shims you can use washers of varying thickness, although this does mean removing the fenders mounting bolt each time you change a washer. Using the correct body shims is much less time consuming as you are able to slip the shims in and out, fig 13, and tighten the bolt so you can assess your adjustment that much quicker. You may discover shims already in place; these can obviously be replaced with thicker or thinner shims as required. Once the shim or shims are in place you should be able to rotate them until they are out of sight, for cosmetic appearances, fig14. |
|
|
|
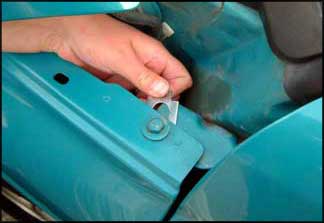 Fig 13 |
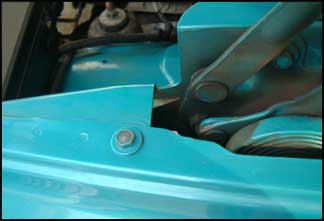 Fig 14 |
This
may sound obvious to some people, but remember that you need to move
the whole panel, just as you did when rotating the door, and not just
a small area as this may stress the panel too much and possibly cause
ripples or creases to appear in the panel. However, some smaller adjustments,
especially at the trailing edge, should not be so problematic. It is
possible to shim adjust the upper rear area of a fender without disturbing
the front end too much, this then means that you are able to leave the
nose cone or grille in place. Finally we move on to the hood and trunk. Compared to door and fender alignment this should be reasonably straightforward. Most hood and trunk hinges have a sensible amount of movement available, certainly enough to open or close most shut lines. Again the rules here are simple, adjust the left hinge in or out, fig 15, for opening or closing the left side leading or trailing edge fig 16. You guessed it, adjust the right hinge for right side leading and trailing shuts. This obviously works equally well for the trunk as well, fig 17. |
|
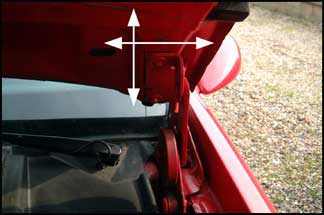 Fig 15 |
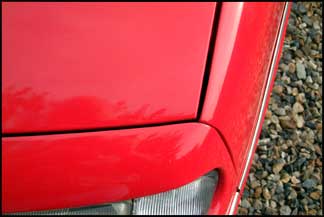 Fig 16 |
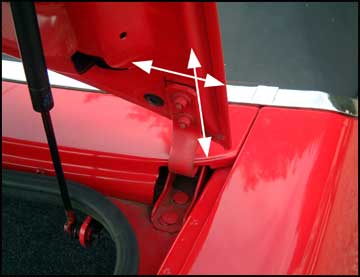 Fig 17 |
|
In
most circumstances it is best to make these adjustments one side at
a time as slackening both hinges can lead to more excessive movement
than is required, as one side hinge will have an effect on the other
side. When trying to obtain small amounts of movement, which is probably
all that is required for most instances, you may only need to reposition
one hinge. The key here is to think about what adjustment you require,
always check before making what may be an unnecessary adjustment. For
moving the hood or trunk lid parallel or evenly left or right, then
both hinges will need to be realigned. This is a straightforward operation
and one that may again benefit from moving one hinge at a time. As we
mentioned earlier do not forget to mark the original position of the
hinges. You will find that moving the hinges individually usually gives
the best results as the non-adjusted hinge acts as an anchor point preventing
the hood or trunk slipping completely out of position. You will find
that most hinges should have sufficient movement within the distance
between the hinge pivot point and mount point to allow the hood or trunk
lid to move over without placing excessive stress on the unadjusted
hinges. With the hinge adjustments made you may find that the hood or
trunk needs to be lower or higher at the latch end. When making a latch
adjustment you will find it prudent to screw the bump stops down first,
then proceed with your adjustment by slackening the latch assembly fig
18. This will prevent any damage to the hood or trunk panel
when testing the latch adjustment. With the latch adjusted as required
remember to adjust the bump stops to prevent movement and noise, fig
19 and fig 20. |
|
 Fig 18 |
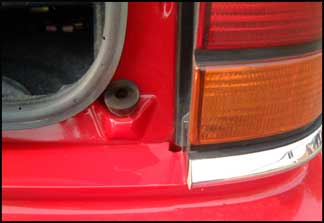 Fig 19 |
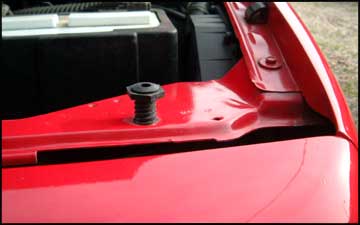 Fig 20 |
|
The bump stops should be brought up a little at a time, just so they cushion the hood or trunk as it is closed. Care should be taken here, as raising the bump stops too much will not only throw the panel out of alignment but could cause damage if the hood or trunk are closed with the stops set in too high a position. It is amazing how many noises can be eliminated from a vehicle just by correctly adjusting these stops. A little patience here can give some very rewarding results, fig 21 and fig 22. |
|
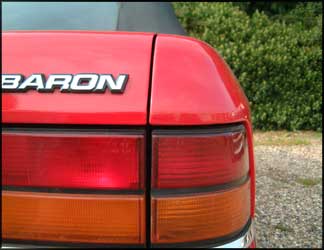 Fig 21 |
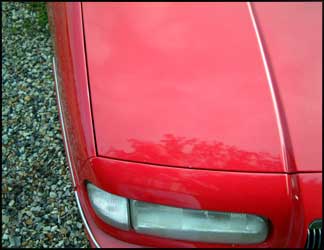 Fig 22 |
With
the main panels of your vehicle now immaculately aligned all that remains
is to get a little picky. Simply making sure that your fuel filler door
is centralised, fig 23, in its recess can ultimately
make or break the look of your vehicle. Fuel door adjustment is usually
extremely simply, normally involving just two screws, fig 24.
If your fuel filler door is on the side of your vehicle then this is
pretty much it. However, on many American vehicles, especially from
the 60’s and 70’s, the fuel filler is often to be found
behind the rear license plate. This can give the added headache of having
to realign the actual license plate once the filler flap is nicely square.
As an additional note it’s always worth a little drop of oil or
grease on the hinges as required, to prevent future ware and a smoother
operation. This is applicable to all the hinges whether they are on
the doors, hood, and trunk or fuel filler door. |
|
 Fig 23 |
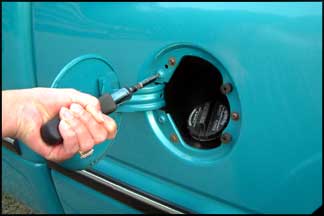 Fig 24 |
As
we mentioned towards the beginning of this article, if your car is a
show car, this attention to detail can be the difference between taking
home the trophy or not. However, if you don’t show your car and
still take the time to align every panel, at least you will have the
satisfaction of knowing that your car is looking the best it can. Hopefully
we have shown you here that you do not need to spend half a million
pounds on a car to have everything fitting just right. Now get to work and who knows next time you’re out and about maybe you will turn even more heads than usual. |
|